
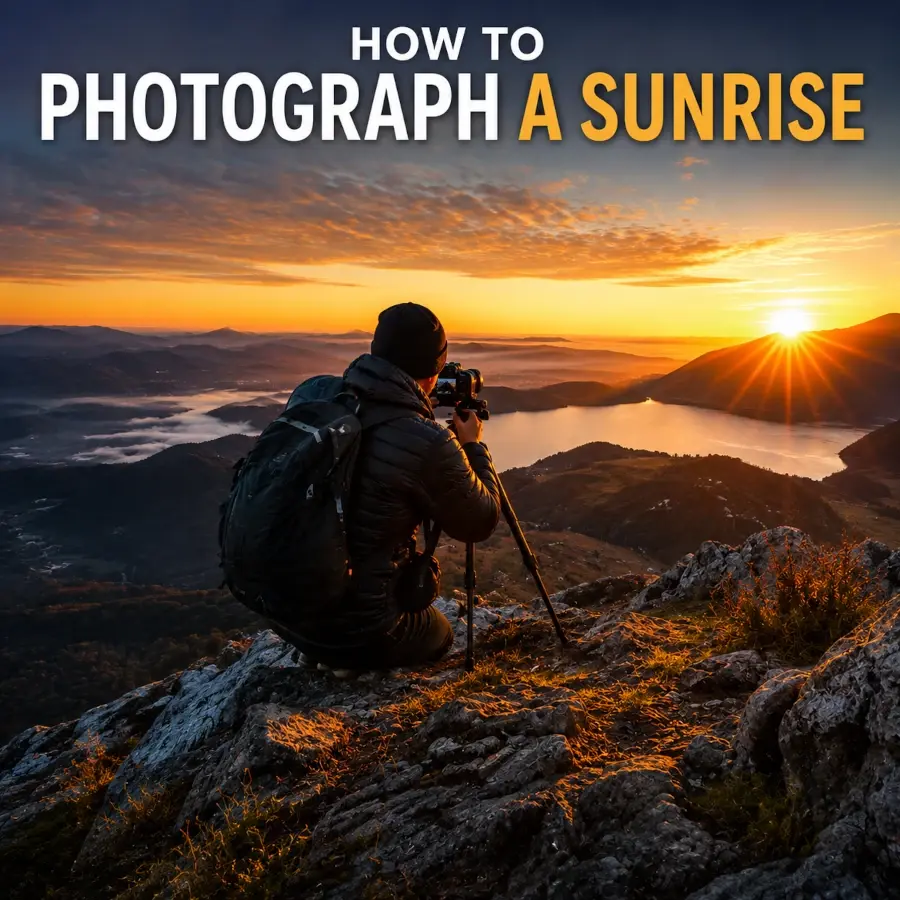
How to Photograph a Sunrise
A working guide to the light, timing, planning, and settings behind a well-exposed sunrise photograph — from scouting the night before to the minutes after the sun clears the horizon.
Sunrise photography rewards preparation more than almost any other genre of landscape work. The light changes fast, the best conditions last only minutes, and by the time the sun is visibly above the horizon, the most dramatic color has often already passed. This guide walks through what’s actually happening to the light before and during sunrise, how to plan around it, what gear and settings earn their place, and the habits — including a few that have nothing to do with the camera — that separate a lucky shot from a repeatable one.
The phases of morning light
Sunrise isn’t a single moment — it’s the visible tail end of a longer sequence of light. Photographers who track these phases, rather than just watching a clock, get far more usable shooting time out of one morning.
| Phase | Sun’s position | What photographers can expect |
|---|---|---|
| Astronomical twilight | 18–12° below horizon | Very dark sky; stars remain prominent; suits very long exposures |
| Nautical twilight | 12–6° below horizon | Deep blue sky; the horizon line becomes easier to make out |
| Civil twilight | 6–0° below horizon | Brighter, colorful sky; often overlaps what photographers call “blue hour” |
| Sunrise | Sun’s upper edge reaches the apparent horizon | Direct sunlight begins; color and contrast can shift within seconds |
| Early post-sunrise | Sun above the horizon and still low | Warm, directional light; often part of the photographic “golden hour” |
| Later morning | Sun climbs higher | Light generally becomes harder, whiter, and more directional |
Worth being precise about: “blue hour” and “golden hour” are photographic conventions, not official astronomical phases. Blue hour typically overlaps part of twilight before sunrise, while golden hour describes the warm, low-angle light around sunrise and sunset — it’s defined by the sun’s angle, not a fixed number of minutes. Neither has one universally accepted definition, and both shift with cloud cover, haze, season, and location.
How early should you arrive
Work backward from sunrise, not forward from when you wake up. These are practical starting points, not fixed astronomical intervals — twilight length and the transition into direct sunlight vary with latitude, season, terrain, and atmospheric conditions, so check the actual sunrise and twilight times for your location rather than reusing the same schedule everywhere.
- 60–75 minutes before sunrise: arrive at your location while it’s still dark. This buffer covers travel, hiking in, and finding your composition without rushing.
- 30–45 minutes before: the sky is often beginning to brighten and develop visible color. Start shooting — this light is often underrated and easy to miss if you’re still setting up.
- 10–0 minutes before: the sky can become intensely colored as the sun approaches the horizon. Keep shooting; the light can change dramatically minute to minute even though the sun hasn’t risen yet.
- 0–20 minutes after: direct low-angle sunlight begins, often the most dramatic window if the sun is rising into cloud or haze.
- 20+ minutes after: light hardens and whitens. Good for detail shots, less so for mood — though some landscapes actually look better once the light has settled.
Plan the sun’s position
Knowing when sunrise happens is only half the planning. Knowing where the sun will actually rise, and what it will and won’t reach, determines whether the location works at all.
- Check the sunrise direction. Sunrise isn’t always due east — the sun’s rise azimuth shifts throughout the year, further north or south of due east depending on the season and your latitude.
- Check the horizon, not just the map. A spot that looks open on a map can have a ridge, building, or treeline blocking the low sun for the first several minutes after it technically rises.
- Consider looking away from the sun. Some of the strongest sunrise photographs face away from it entirely, toward mountains, buildings, or clouds lit by warm side-light.
- Track the sun’s altitude, not just its rise time. The sun’s position and the shadows it casts change quickly around sunrise — a composition that works at the horizon may look completely different fifteen minutes later.
- Use a sunrise and sun-position tool to check direction, altitude, and timing for your exact location before you go. See our guide to sunrise photography spots and times for help matching a location to the light.
How weather changes a sunrise
For sunrise photography, weather isn’t just a factor in whether you go out — it’s part of the photograph.
- Broken clouds. Often ideal, because gaps can allow low-angle sunlight to illuminate cloud edges and undersides, producing contrast and texture.
- High, thin clouds. Can carry color across a large portion of the sky rather than concentrating it near the horizon.
- Clear skies. Predictable light, but sometimes a less dramatic sky — good conditions for foreground-focused compositions instead.
- Fog and mist. Can create atmospheric layers, depth, and a soft glow around the light source.
- Haze. Can intensify color near the horizon but also reduces contrast — watch for a flat, milky look in the wider scene.
- Smoke, dust, and aerosols. Particles in the atmosphere can intensify reds and oranges near the horizon, though heavy smoke or haze can also flatten contrast and obscure the sun — often the explanation behind an unusually red sunrise.
- Rain or approaching weather. Can produce dramatic skies, but weigh exposure difficulty, equipment protection, and personal safety before committing to a shoot.
Sunrise photography safety
Arriving 60–75 minutes before sunrise usually means walking in while it’s still dark, often somewhere unfamiliar. A few habits keep that safe.
- Scout unfamiliar locations in daylight first, so you’re not learning the terrain for the first time in the dark. Our guide to the best sunrise hikes covers what to look for when scouting.
- Carry a headlamp with fresh batteries for the walk in and out.
- Watch for cliffs, loose rock, unstable ground, and tides — all harder to judge in low light.
- Check tide times before coastal shoots. A route that’s clear on arrival can become inaccessible or hazardous as the tide changes.
- Avoid walking backward while composing a shot, especially near edges or water.
- Check weather and local conditions before heading out, particularly at coastal or exposed locations.
- Tell someone your plan — location and expected return time — for remote or solo trips.
- No photograph is worth compromising your safety. If a location feels wrong in the dark, it’s fine to back off and try again another day.
Essential gear
Sunrise photography doesn’t demand exotic equipment, but a few items consistently earn their weight.
| Item | Why it matters |
|---|---|
| Sturdy tripod | Low light before and during blue hour often calls for shutter speeds too slow to hand-hold |
| Remote or timer release | Eliminates camera shake from pressing the shutter directly |
| Graduated ND filter | Useful for balancing sky and foreground in-camera when the horizon is relatively clean; less effective against an irregular skyline of trees or mountains, where bracketing is often more flexible |
| Polarizer | Can reduce reflections and atmospheric haze; its effect on the sky is strongest at certain angles to the sun, so check the viewfinder before deciding whether to use it |
| Wide-angle lens | Standard choice for sweeping horizon compositions |
| Telephoto lens | Compresses the sun against a subject — useful for silhouettes and layered landscapes |
| Extra batteries | Cold mornings and long exposures or live view drain batteries faster than usual |
| Lens cloth | Dew and condensation on the front element are common in the hour before sunrise |
| Spare memory card | Cheap insurance against a full or failed card mid-shoot |
| Basic weather protection | A rain cover or plastic bag, if conditions are uncertain |
| Headlamp | For the walk in and out, and to see your own controls before sunrise |
Camera settings
There’s no single correct exposure for a sunrise — settings depend on the specific light, sky, and effect you’re after. These are starting points and the reasoning behind them, so you can adjust rather than follow them blindly.
The four settings that matter most
- Aperture controls depth of field and, at very narrow openings such as f/16–f/22, can produce a sunstar effect from the sun’s disc.
- Shutter speed controls motion and overall exposure — on a tripod, slow shutter speeds are usable in a way they aren’t handheld.
- ISO is generally kept low when the camera is tripod-mounted, but raising it is the right call once shutter speed matters more, such as shooting handheld after the light has strengthened.
- White balance shapes the recorded color of the scene. If you shoot RAW, it’s largely a starting interpretation you can refine afterward rather than a permanent choice.
How those settings tend to shift across the morning:
-
Blue hour
Light is even and low. A tripod-mounted starting point is ISO 100–200, aperture around f/8–f/11, and a shutter speed that runs long — often several seconds. A fixed white balance, rather than auto, helps keep color consistent from frame to frame as the light shifts.
-
As the sky colors
Shutter speeds shorten as the sky brightens. ISO 100–400 and f/8–f/16 are reasonable, and metering for the sky rather than the shadows tends to work better — foreground detail is usually easier to recover in post than a blown-out sky.
-
Sun at the horizon
Dynamic range peaks here. Bracketing three to five exposures a stop or two apart for later blending is often more flexible than a single frame, particularly against an uneven horizon. Narrow the aperture toward f/16–f/22 if you want a pronounced sunstar from the sun’s disc, but check the result for diffraction softness at the smallest apertures.
-
Post-rise
Light flattens and whitens quickly. This window suits detail and texture shots as much as wide dramatic scenes — raise ISO if needed to keep shutter speeds fast enough for handheld work, and consider switching to a longer lens for compressed, layered compositions.
How to focus before sunrise
Exposure gets most of the attention in sunrise guides, but focusing in near-darkness is its own problem.
- Expect autofocus to struggle in low light and low-contrast scenes — hunting back and forth without locking is common before the sky brightens.
- Find a distant target to focus on, such as a light, a bright edge, or any object roughly at the distance of your intended scene.
- Switch to manual focus once it’s set, and avoid touching it again so the camera doesn’t hunt between exposures as light changes.
- Check focus at high magnification using live view before the light gets critical, rather than trusting a small preview screen.
- Don’t rely on the sun itself as your focus target. Focus instead on a distant landscape feature, or another subject at roughly the same distance as the important part of your composition.
Composition techniques
Technical execution gets you a correctly exposed frame; composition is what makes it worth looking at.
- Decide what the subject actually is. A sunrise photograph doesn’t have to be about the sky — foreground, texture, or a distant landmark can carry the frame instead.
- Foreground interest. A bare horizon and sky rarely hold attention on their own — rocks, water, plants, or structures give the eye somewhere to start.
- Off-center horizons. Placing the horizon on a third rather than dead-center usually reads as more intentional — low for a dramatic sky, high for a strong foreground or reflection.
- Include a sense of scale. A person, tree, or building can show how large the landscape actually is.
- Don’t automatically center the sun. It can anchor a composition without sitting in the exact middle of the frame.
- Leading lines. Shorelines, paths, and ridgelines can pull the eye toward the rising sun.
- Silhouettes. Underexposing a foreground subject against a bright sky turns it into a graphic shape — effective with trees, figures, or distinctive terrain.
- Reflections. Still water doubles the color of the sky; a centered horizon can work well specifically to showcase symmetry.
- Try more than one focal length. Wide, standard, and telephoto compositions from the same spot can tell noticeably different stories.
- Look behind you. The light opposite the sun — on clouds, hills, or buildings — is sometimes stronger than the sunrise itself.
Shoot the entire sunrise
One of the most common beginner habits is waiting for a single “perfect” moment and shooting only that. Sunrise light changes too fast for that approach to pay off consistently — treat it as a sequence instead. For example, make a few deliberate passes through the scene:
- Before sunrise, while the sky is still dark or just beginning to color
- As color intensifies in the final minutes before the sun appears
- At the moment the sun reaches the horizon
- 5–15 minutes after, once direct light is on the landscape
- 20–30 minutes after, once the light has settled and hardened
Shooting through each stage, rather than rushing to one, means coming home with a real choice of images instead of a single bet on timing.
Shooting into the sun
Photographing “a sunrise” usually means photographing toward the sun directly, which brings its own set of problems worth planning for.
- Lens flare and ghosting. Shooting into a bright point source can produce streaks or repeated shapes across the frame — sometimes unwanted, sometimes a deliberate part of the shot.
- Reduced contrast. Stray light scattering inside the lens can wash out an image; a clean, well-shaded front element helps.
- Use a lens hood where practical, and keep the front element clean — dust and smudges become far more visible directly into the light.
- Consider hiding the sun’s disc partly behind a tree, ridge, or structure to control flare and add a compositional anchor.
- Bracket for the full range, since a scene facing directly into the sun usually exceeds what a single exposure can hold.
- Protect your eyes. Avoid staring at the sun through an optical viewfinder, and use the camera’s live-view screen when appropriate — but never look directly at the sun with your eyes, even close to the horizon. Atmospheric conditions can make it appear less intense, which isn’t the same as it being safe to view directly.
Common mistakes and how to avoid them
- Arriving at the official sunrise time. By then, the color-rich minutes of twilight beforehand — often the best light — are already gone.
- Using the wrong sunrise time. Double-check the time is for your actual date and location, including any daylight saving offset.
- Not checking the horizon in person. A calculated sunrise time doesn’t guarantee the sun is actually visible from your specific viewpoint.
- Underexposing the foreground. Metering only for the bright sky leaves everything else too dark. Bracket exposures or use a graduated filter instead.
- Ignoring white balance. Leaving it fully on auto can flatten the color shift across the morning — a fixed or custom setting preserves more of it.
- Skipping a tripod in low light. Blue hour shutter speeds are frequently too slow to hand-hold without blur.
- Focusing too late. Establish and lock focus before the light gets too dark for autofocus to keep up.
- Only photographing the sun itself. The surrounding landscape, or the light behind you, is often the stronger subject.
- Leaving right after sunrise. Some scenes look better 10–30 minutes later, once the light has developed further.
Post-processing basics
Sunrise files usually need less manipulation than photographers expect — the light is already doing most of the work.
- Correct white balance first. Adjust temperature and tint before touching exposure or color, since it affects how every other edit reads.
- Blend or recover exposure. If you bracketed, blend manually or with HDR merge tools; if you shot a single RAW, recover highlights and lift shadows within reason.
- Recover highlights carefully. Don’t try to force detail back into a fully blown-out sun — some clipping around the sun itself is normal and expected.
- Use local adjustments. Editing the sky and foreground separately usually looks more natural than pushing global shadow or saturation sliders.
- Be careful with dehaze. Useful for atmospheric haze, but easy to overdo — watch for unnatural contrast in the sky.
- Check lens corrections. Chromatic aberration and distortion are often more visible against a high-contrast horizon.
- Remove dust spots. Small sensor or lens marks stand out clearly against a bright, even sky.
- Be restrained with saturation. Sunrise colors are naturally vivid — pushing saturation further, especially into an unnaturally orange sky, often looks artificial rather than more dramatic.
- Check for gradient banding. Skies are prone to visible banding after heavy editing; export at high bit depth and inspect at full resolution before finishing.
Frequently asked questions
What is the best time to photograph a sunrise?
There isn’t one single best moment — the strongest light is often spread across a window that starts 30–45 minutes before sunrise and continues through the first 20 minutes after. Treat sunrise as a sequence to shoot through rather than one exact time to hit.
How long before sunrise should I arrive?
Aim for 60 to 75 minutes before the official sunrise time. This covers travel and setup while leaving you in position for the color-rich minutes of twilight beforehand, which frequently produce stronger images than the moment of sunrise itself.
What camera settings should I use for sunrise photography?
Start low and slow on a tripod during blue hour — ISO 100–200, around f/8–f/11 — then adjust ISO and shutter speed as the light strengthens. The right settings depend on the specific scene and effect you want, so treat these as a starting point rather than a fixed rule.
Should I shoot RAW or JPEG?
RAW. Sunrise scenes routinely exceed what a compressed JPEG can hold, and RAW files preserve recoverable highlight and shadow detail along with the flexibility to adjust white balance after the fact.
What lens is best for sunrise photography?
A wide-angle lens is the more common choice for sweeping horizon compositions, but it isn’t the only option. A telephoto lens compresses distance and works well for silhouettes or isolating part of a scene against the rising sun.
Should I use a tripod for sunrise photography?
Yes, for the darker phases at least. Blue hour and the minutes before sunrise often call for shutter speeds too slow to hand-hold cleanly, and a tripod also makes bracketing multiple exposures far more consistent.
How do I photograph the sun without blowing out the sky?
Meter for the sky rather than the foreground, and consider bracketing several exposures or using a graduated ND filter on a relatively clean horizon. Some clipping directly around the sun’s disc is normal and not worth chasing away.
Why do my sunrise photos look too dark or washed out?
Washed-out results are usually caused by metering for the foreground rather than the sky, or by shooting well after the color-rich window has passed. Underexposed foregrounds are usually the opposite problem — metering only for a bright sky. Bracketing exposures addresses both.
What direction does the sun rise?
Generally somewhere along the eastern horizon, but the exact direction shifts throughout the year and depends on your latitude. Check the sunrise azimuth for your specific date and location rather than assuming due east.
What should I photograph before the sun actually rises?
The 30–45 minutes of twilight beforehand are often the most colorful and evenly lit part of the whole morning. Wide sky-and-landscape compositions, reflections, and silhouettes all tend to work well before the sun itself is in frame.